Read Time16 Minute, 38 Second
Git is the leading distributed version control system and a necessary tool in the developers’ arsenal that simplifies collaboration, streamlines code management, and ensures efficient version control. Whether you are a beginner aiming to understand the basics or an experienced developer looking to refine your skills, this comprehensive guide to Git commands is your one-stop resource. Packed with practical examples and detailed explanations, this article will equip you with the knowledge to master Git and enhance your development workflow.
Contents
Git History
Git was created by Linus Torvalds for version control during the development of the Linux kernel The trademark “Git” is registered by the Software Freedom Conservancy, marking its official recognition and continued evolution in the open-source community.
Git Components & Concepts
To truly master Git, we must understand key concepts that define how it operates. Here’s a breakdown:
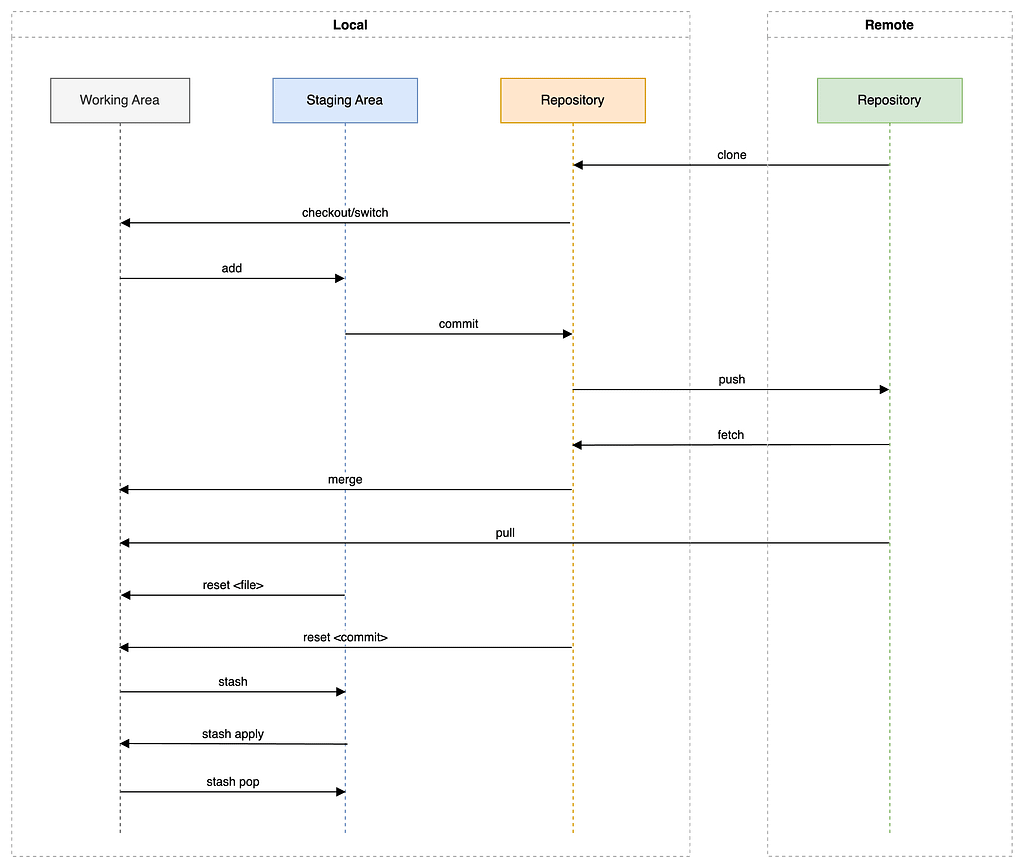
Locations
As part of development using git, you’ll work with multiple locations where files are stored. Here’s a summary of what these locations mean:
Local Working Directory
This is where the code editor saves the files that are being edited.
Staging Area
The staging area, also known as Index, acts as a buffer zone where you prepare changes before committing them.
Repositories
A local repository is stored on your computer, where you work on changes and commits. Represents your personal workspace where your changes are stored, including commits.
A remote repository, hosted on platforms like GitHub, GitLab, or Bitbucket, is used for collaboration. Centralized version for sharing and collaboration.
When you commit a change, it is committed only to the local repository. Commits are propagated to remote repositories only when push command is executed.
Branches
Branches enable parallel development by isolating changes into separate lines of development. This feature allows multiple developers and teams to work on different parts of the same project at the same time, and merge their changes when they’re done.
Git supports multiple branching strategies. A separate article on branching strategies, and when to use what, will follow later.
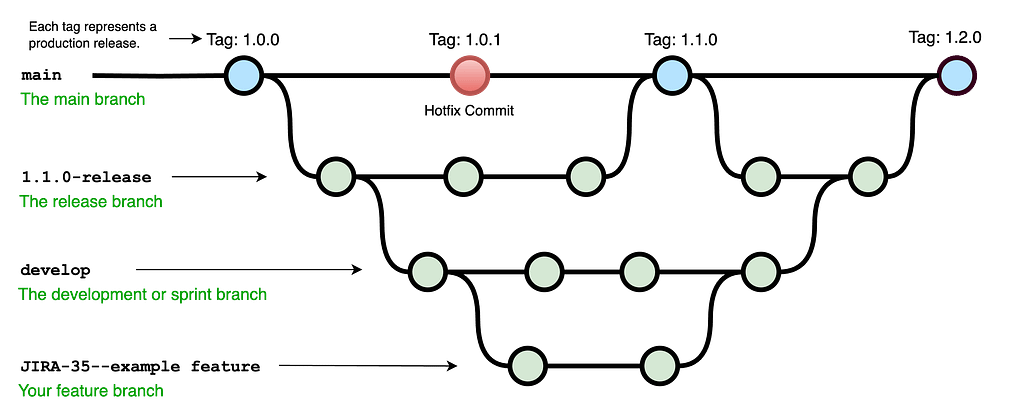
This image represents a sample branching strategy.
Stashing
Stashing lets you save your work temporarily and revert your working directory to a clean state. Ideal for switching contexts without committing.
Push and Pull
Push and pull commands allow you to synchronize changes between your local and remote repositories.
Rebasing
Rebasing rewrites commit history by integrating changes from one branch into another, producing a cleaner, linear history.
Merging & Merge Conflicts
Merging is the task of applying the changes in one branch to another, typically from a child branch to a parent branch. Conflicts occur when multiple changes are made to the same lines of code. Resolve conflicts manually by editing the conflicting file.
Commit History
The commit history is a chronological record of changes in your repository. Tools like git log or gitk help visualize the history.
Detached HEAD
When in a detached HEAD state, you are working on a specific commit instead of a branch. To get back, switch to a branch using git checkout.
Ignoring files
The .gitignore file contains the list of directories and files that must be ignored by the git commands. It supports wildcards and is used to exclude temporary files, build files and binaries. logs, dependencies, etc.
Hooks
Git hooks are scripts that are triggered by specific events in the Git lifecycle. They allow you to automate actions in response to certain operations, such as committing code, merging branches, or pushing to a repository. Git hooks are powerful tools that help enforce coding standards, run tests, or execute custom scripts automatically.
Getting Started with Git
Installing Git
Download Git from git-scm.com and follow the setup instructions
Before diving into commands, ensure Git is installed on your system correctly by checking the version:
$ git --version
Configuring Git
The config switch is used to set configurations for your git setup. This command lists all the global configurations set for Git on your system.
$ git config --list
The first time you start using Git, you must set up your name and email which will be associated with your commits.
$ git config --global user.name "Your Name"
$ git config --global user.email "your.email@example.com"
Basic Git Commands
Initializing a Repository
The init command initializes a new Git repository in the current directory and prepares the directory for version control. It creates a .git folder to track changes. The folder is hidden by default and cannot be seen unless you’ve enabled viewing hidden folders in your computer.
$ git init
Cloning a Repository
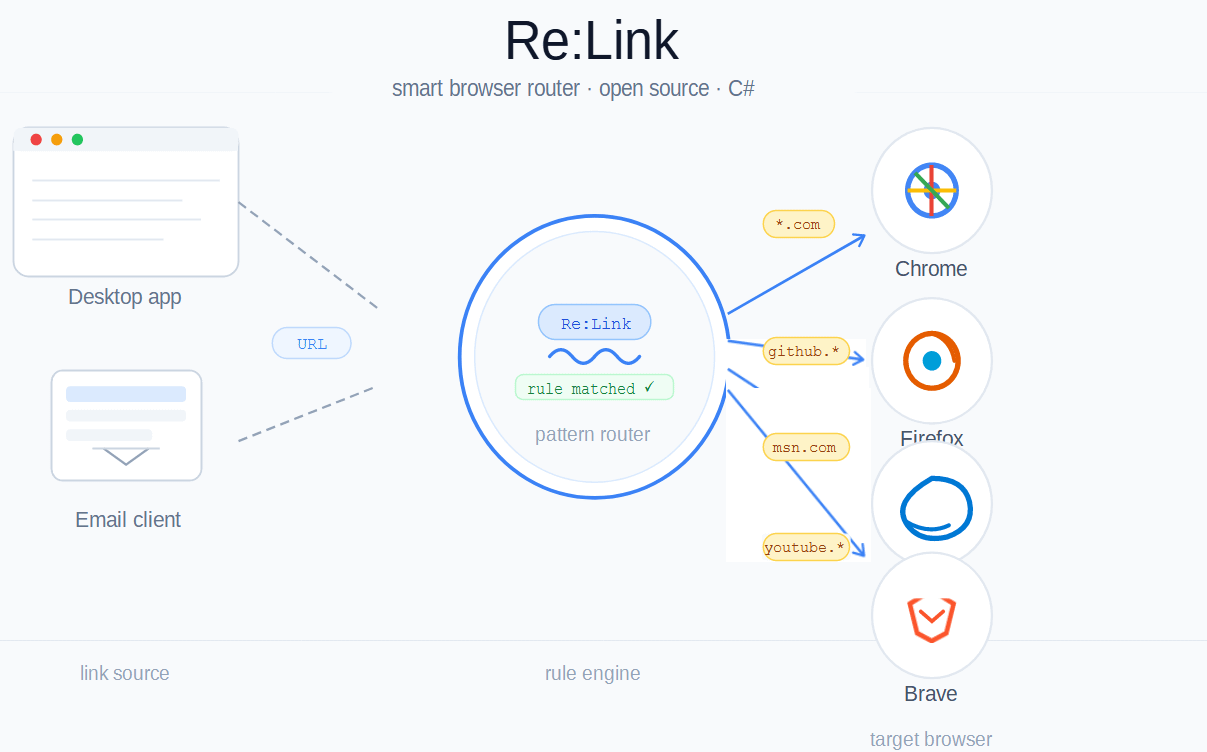
Run the clone command to copy an existing remote repository to your local system, including its entire history. For example, if you wish to contribute to the open source project Re:Link, copy the clone url from the browser from its git page:
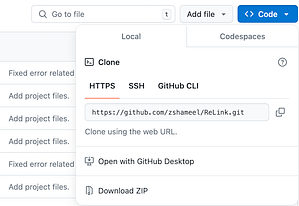
And then execute the clone command with the git url of the project.
$ git clone https://github.com/zshameel/ReLink.git
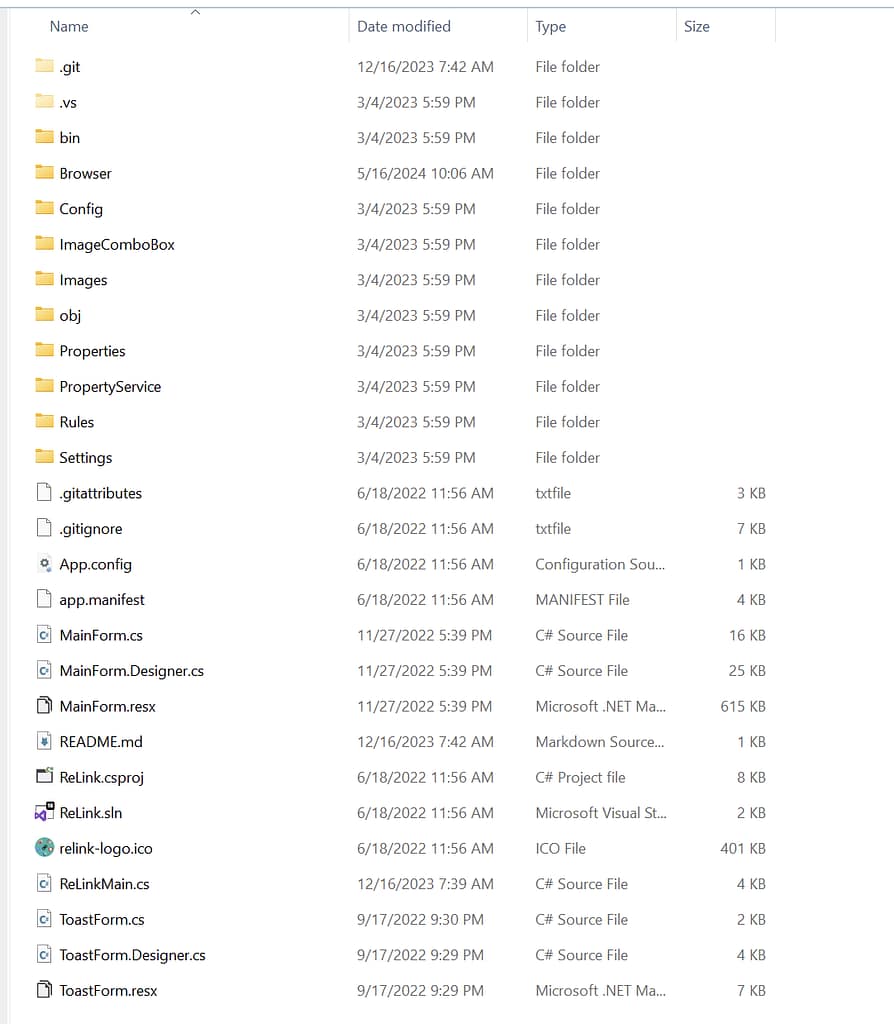
Once cloning is completed, you’ll see your local folder structure similar to the project in github.
Managing Changes
Checking Status
Displays the state of the working directory and staging area, showing untracked files, changes to tracked files, and files ready to commit.
$ git status
Adding Files to Staging Area
The add command adds specified files or all changes in the current directory (.) to the staging area. This process is called staging and is a prerequisite for committing the changes.
$ git add <file_name>
$ git add .
Committing Changes
The commit command applies changes from the staging area to the repository with a descriptive commit message.
$ git commit -m "Your commit message"
Viewing Commit History
The log command shows the commit history.
$ git log #Displays a detailed commit history.
$ git log --oneline #Shows a concise one-line summary for each commit.
$ git log --graph #Visualizes the commit history as a graph.
Branching and Merging
List all Branches
The branch -a command lists all local and remote branches. The * in the output denotes the current branch.
$ git branch -a
You’ll see an output similar to this:
* main
  remotes/origin/main
Creating a New Branch
The branch command without any options creates a new branch with the specified name.
$ git branch <branch_name>
Switching Branches
The checkout command switches to the specified branch, updating the working directory to match. You can also use the switch command to switch to a specific branch.
$ git checkout <branch_name>
#OR
$ git switch <branch_name>
Creating and Switching in One Step
These commands create a new branch and switch to it in a single step.
$ git checkout -b <branch_name>
#OR
$ git switch -c <branch_name>
Checkout vs Switch
The checkout command is a multi-purpose command used for switching branches, restoring files, and checking out specific commits. However, its broad usage can make it confusing for beginners. The switch command was introduced in Git 2.23 to focus solely on switching branches, making it more user-friendly and less error-prone.
Merging Branches
The merge command integrates changes from the specified branch into the current branch. First, switch to the branch where you need to changes to be merged (the receiving branch). Second, execute the merge command with the name of the branch that contains the changes to be merged.
$ git checkout main
$ git merge feature1
In this example, changes from the feature1 branch are merged into the main branch.
Deleting a Branch
The branch command with the -d switch removes a branch, but warns you if there are unmerged changes. The -D (uppercase) switch forcefully deletes a branch even if it has unmerged changes. Use this with caution as you may lose changes.
$ git branch -d <branch_name> #Warns about unmerged changes
$ git branch -D <branch_name> #Force delete
Collaborating with Remotes
Before working with remote repositories, make sure you have the permissions to perform the necessary operations. Otherwise, you may encounter errors.
Viewing Remotes
The remote command allows you to manage your remote repositories. The -v switch lists all remote repositories associated with your local repository.
$ git remote -v
Adding a Remote
The remote add command links your local repository to a remote repository, typically hosted on platforms like GitHub or GitLab. If you to started developing from your local computer instead of cloning from a remote repository, this command allows you to link your local repository to a remote repository.
$ git remote add origin <repository_url>
Removing a Remote
The remote rm command removes or unlinks the remote repository. This command is used when you wish to change your remote repository.
$ git remote rm origin
Fetching Changes
The fetch command retrieves updates from the remote repository without merging them into your local branch.
$ git fetch origin
Pulling Changes
The pull command fetches updates from the remote repository and merges them into the current branch. A pull command is a combination of fetch and merge commands.
$ git pull origin <branch_name>
Pushing Changes
The push command sends your local branch’s commits to the corresponding remote branch.
$ git push origin <branch_name>
If the branch that is being pushed was first created locally and does not exist in the remote repository, you must specify the upstream branch name with the --set-upstream option.
$ git push --set-upstream origin new-branch
To automatically create a remote branch with the same name as the local branch, set this global config option:
#git version git >= 2.37.0
git config --global push.autoSetupRemote true

#older git versions
git config --global push.default current
Undoing Changes
Unstaging Files
The reset command removes a file from the staging area but keeps its changes in the working directory.
$ git reset <file_name>
Reverting a Commit
The revert command creates a new commit that undoes the changes introduced by a specific commit, while preserving history.
$ git revert <commit_hash>
Resetting to a Previous Commit
You can reset to a specific commit using the reset command with the following options:
$ git reset --soft <commit_hash> #Keeps changes in the staging area.
$ git reset --mixed <commit_hash> #Removes changes from the staging area but retains them in the working directory.
$ git reset --hard <commit_hash> #Removes all changes and resets the working directory.
Stashing Changes
Saving Work in Progress
The stash command temporarily saves uncommitted changes, allowing you to work on something else.
$ git stash
Viewing Stashed Changes
The stash command with the list option lists all stashes saved in the repository.
$ git stash list
Applying Stashed Changes
The apply and pop options are used to apply the stashed changes back to the working area.
$ git stash apply
$ git stash pop
Dropping a Stash
The drop option deletes a specific stash.
$ git stash drop
Advanced Git Commands
Cherry-Picking Commits
The cherry-pick command applies a specific commit from one branch onto the current branch.
$ git cherry-pick <commit_hash>
Rebasing
The rebase command reapplies commits from one branch onto another, creating a linear commit history.
$ git rebase <target_branch_name>
Example:
git checkout feature
git rebase main
This replays the commits from feature onto the latest state of main, effectively integrating the changes from main into feature while keeping a linear history.
Interactive Rebasing
The rebase command with the -i option combines multiple commits into a single commit during an interactive rebase. It allows you to modify the commit history by editing, squashing, or reordering commits.
$ git rebase -i <commit_hash>
Rebase vs. Merge
Rebase may look the same as merge but there are a few fundamental differences.
Rebase
Rewrites history by replaying commits on top of another branch. It avoids merge commits and creates a clean, linear history.
Pros: Cleaner history, ideal for integrating changes from the main branch into feature branches.
Cons: Can be destructive if misused; you lose context of branch merging.
Merge
Combines branches by adding a merge commit. It preserves the original branch structure.
Pros: Non-destructive, retains the full history of branches.
Cons: Results in a cluttered history with multiple merge commits.
Viewing Differences
The diff command displays the differences.
$ git diff #Shows changes in the working directory.
$ git diff <commit_hash> #Displays changes introduced by a specific commit.
Git Tag
A Git tag is a reference that points to a specific commit in the Git history. Tags are commonly used to mark important points in the project, such as a release version (e.g., v1.0.0, v2.3.1). Unlike branches, tags are immutable, meaning they don’t change as new commits are added to the repository.
There are two types of tags:
Lightweight Tag
These are simply pointers to a specific commit, like a branch but without additional metadata.
Annotated Tag
These store metadata such as the tagger’s name, email, date, and an optional message. Annotated tags are recommended for marking official release points.
Creating Tags
$ git tag <tag_name> #Creates a lightweight tag.
$ git tag -a <tag_name> -m "Tag message" #Creates an annotated tag.
Viewing Tags
Lists all tags in the repository.
$ git tag
Pushing Tags to Remote
Sends tags to the remote repository.
$ git push origin <tag_name> #push a specific tag
$ git push origin --tags #push all tags
Deleting Tags
Delete a local tag
git tag -d <tag_name>
Delete a remote tag
git push origin --delete <tag_name>
Debugging with Git
Bisecting
Helps identify a commit that introduced a bug by performing a binary search through the commit history. More on this in a separate article later.
$ git bisect start
$ git bisect bad
$ git bisect good <commit_hash>
$ git bisect reset
Blaming
Displays line-by-line changes for a file, showing who made each change.
$ git blame main.py
Sample output:
7f3a8c9a (Alice Johnson 2023-01-05 15:30:12 +0200) def calculate_sum(a, b):
bd13c9b2 (Bob Smith    2023-01-06 09:42:21 +0200)     return a + b
4e9d23f0 (Alice Johnson 2023-01-07 11:00:33 +0200) def main():
bd13c9b2 (Bob Smith    2023-01-08 10:00:45 +0200)     print(calculate_sum(5, 10))
Cleaning Up
Removing Untracked Files
The clean command deletes untracked files and directories from the working directory.
$ git clean -n #Lists the files and directories that would be removed, does not delete.
$ git clean -f #Deletes untracked files.
$ git clean -fd #Deletes untracked files and directories.
Conclusion
In this comprehensive guide, we explored a wide array of Git commands, ranging from basic operations like initializing a repository to advanced techniques such as rebasing and debugging. Mastering these commands enables developers to efficiently manage their repositories, collaborate seamlessly, and troubleshoot issues effectively. Remember, consistent practice and integration into your daily workflow are key to becoming proficient in Git. Use this guide as your reference to navigate and resolve challenges with confidence. Happy coding!